In order to maintain safe operation and dependable service while bringing a boiler system on or offline, follow Cleaver-Brooks recommended step-by-step procedure
These steps vary depending on whether the system is hot or cold. The below steps detail how to bring a cold boiler system online. A cold boiler system is one in which the entire piping system and the boiler are cold or at ambient temperature. The system is in a contracted state and will expand as the system heats up.
Recommended steps:
- Check the system piping and valves for any evidence of leaking such as dripping or calcium deposits on the piping, joints and fittings.
- Inspect the expansion joints for their ability to properly expand when the system “grows” with heat.
- Check the fuel supply. For heavy oil, check that the preheating equipment (electric and/or steam) is functional. For light or heavy oil, confirm that the tank is full and void of water near the tank bottom. If firing gas, ensure there is proper pressure at the main regulator.
- Make sure that all inspection openings in the boiler are properly gasketed and closed. Open the covers on the vent stack and any manual dampers in the breeching or stack.
- Open the boiler vents. Open the manual boiler feed valve. Make sure the blowdown valves are closed and any bypass valves are closed. Open the manual gas valves and check for any leakage from the automatic valves in both the main and pilot. Check the safety valves for proper piping and safe discharge through the roof.
- Fill the boiler with water to the proper level as indicated by the boiler’s sight glass.
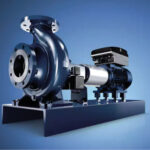
- Check the boiler feed system, including the pumps for proper alignment and packing, if required. Check the automatic feedwater valve for any signs of leaking or damage. Allow the feed system to fill to its proper level and apply power to check the operation of the pumps, including their pressure.
- Check the condensate transfer pumps throughout the system for proper condition and operation.
- Engage the burner switch, bringing power to the boiler’s control circuit. Visually inspect the pilot and main flame ignition. Test the flame scanner for proper operation.
- Begin warming the boiler slowly, allowing for gradual expansion. Open the (automatic) non-return and main steam stop valves. Open all drain valves in the system to allow condensate to exit the piping before steam fills the system.
- Watch the gauge glass on the boiler’s low water cutoff to make sure the proper level is maintained.
- After the pressure reaches approximately 15 psig, close the boiler air vents.
- Blow down the low water cutoff and its gauge glass.
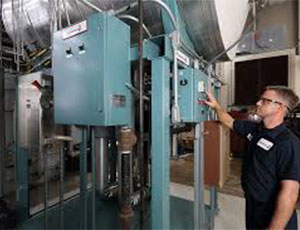
- Check that the operating systems are working properly, including the boiler and the boiler feed system.
- Check the water softener and/or dealkalizer for electrical power, operation and brine tank filling.
- Switch the boiler over to automatic operation and monitor for a time to assure safe, reliable operation.
Boiler shutdown (these steps are the same for a hot system.)
- Power the burner off.
- Shut off the fuel to the burner.
- If equipped, open the superheater outlet drain valve.
- Close the main steam stop valve(s), and open all drains.
- Shut down the boiler feed system.
Source: Cleaver-Brooks
Contact your local office for assistance.